

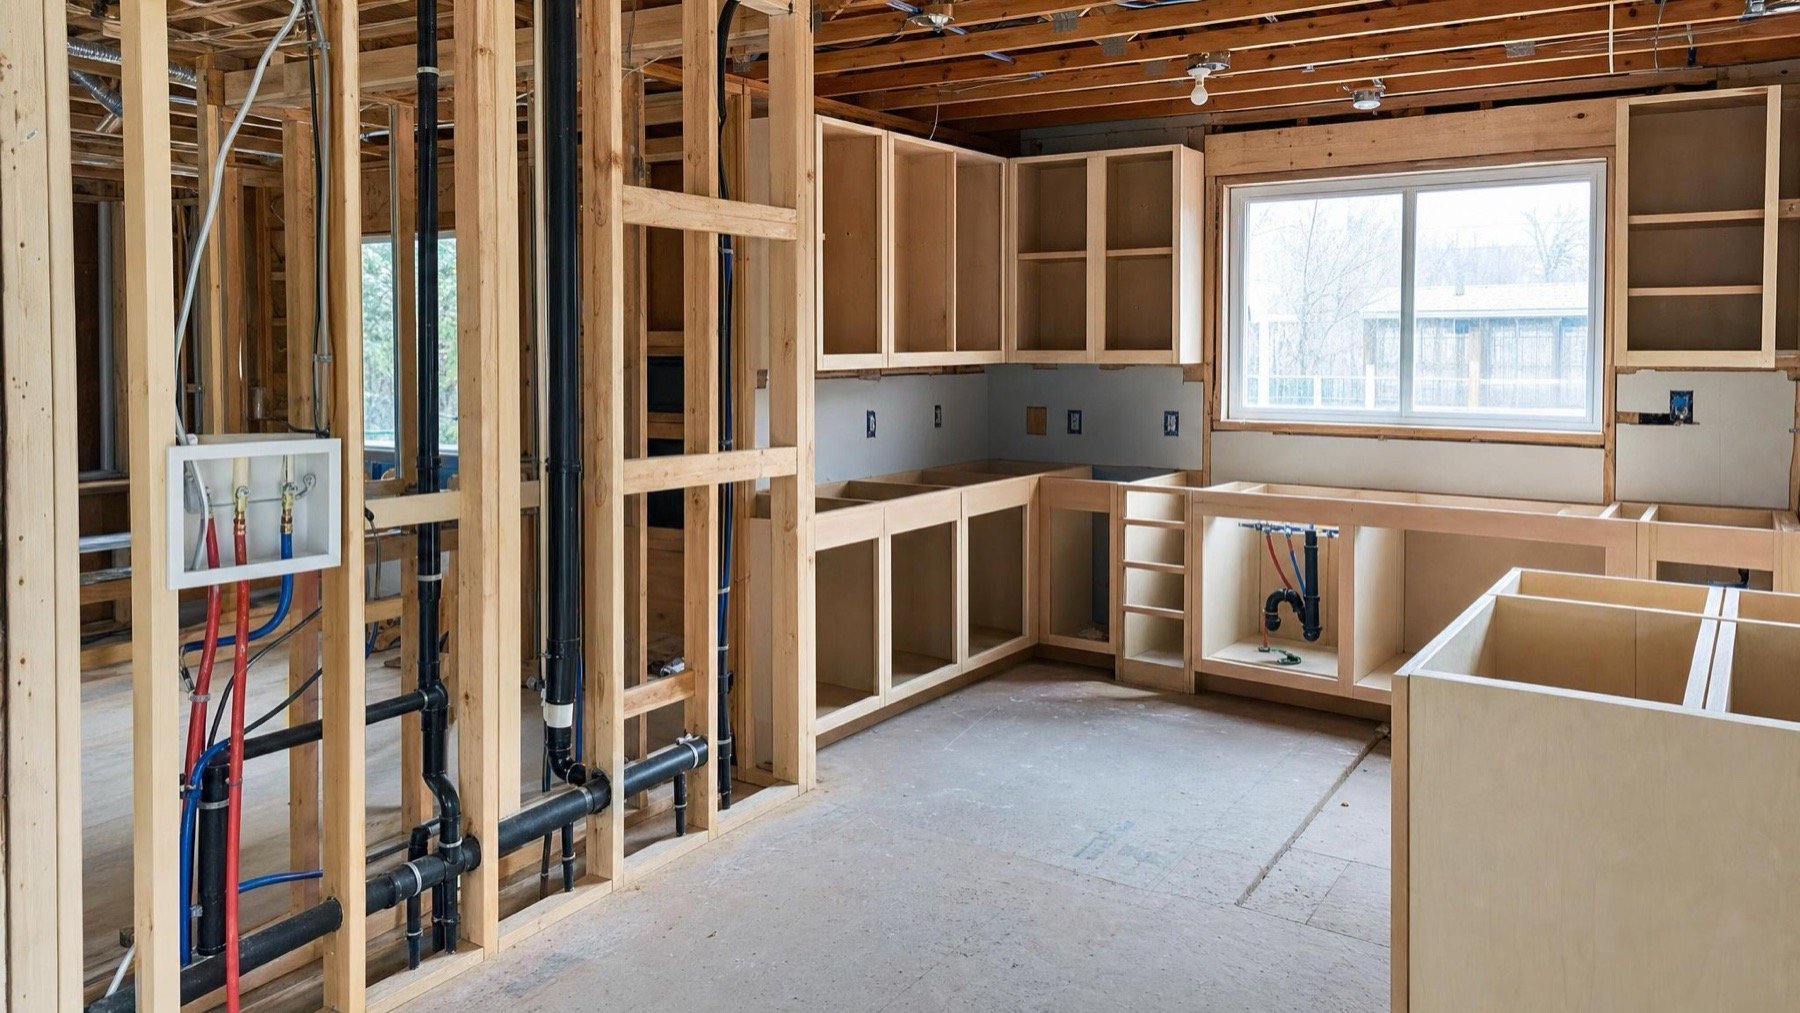
A move list drawn before finishes are chosen tells every trade where the plumbing, walls and windows will end up.
Picture the first planning meeting for a kitchen renovation in Kitchener. Most of the talk drifts toward cabinet colours and counters, yet the decision that shapes the price is quieter: which parts of the room will physically move. A sink that shifts to an island, a wall that opens to the dining room or a wider window over the counter each turns a finish project into a construction project.
We plan kitchens in the same order every time: the moves first, then the work inside the walls, then the allowances that make a price readable. It is the sequence behind our kitchen work in Oakville, and it suits a Kitchener semi just as well as a larger detached home.
Split the plan into moves and finishes
Start with two lists. The first holds anything that changes position: the sink, dishwasher, range, fridge water line, a wall or a window opening. The second holds everything that changes appearance in place: cabinets, counters, backsplash, flooring, paint and light fixtures. The second list is where most of the enjoyable choices live, but the first list decides how big the project is.
The City of Kitchener sorts common projects in a similar way on its building permit examples page, with one list of work that needs a permit and another of work that does not. Read your moves list against both before you collect prices. Changes that shift plumbing, open a wall or widen a window opening are the ones to check closely, while cosmetic work on the existing layout tends to sit on the lighter side. The City also notes in the same permit guidance that its examples of projects needing a permit are not a complete list. Confirm the final scope with the City before work is booked.
That split matters most at the sketch stage. A kitchen that keeps the sink, range and dishwasher where they are can be planned as a finish project on the existing layout. A kitchen with a new island sink or a wider window needs drawings and approval time before construction, and an honest schedule shows that time. Neither path is better. They are different projects, and they deserve different prices. Approval sits with the local building department. Ontario's Building Code guidance explains that enforcement of the Building Code is the responsibility of municipal building officials, which is why the Kitchener list is the one to check rather than a rule of thumb from another city.
Open walls set the order of the trades
Once the drywall comes off, the work inside the walls runs in a fixed sequence. Drains and supply lines go in first, then circuits for appliances, counter outlets and lighting, then the route for the range hood duct. Insulation, drywall and cabinets follow, and any inspection for that stage happens while the wall is still open. Closing a wall before every decision is final is like closing a file before every signature is on it. The only fix is to open the wall again.
Electrical work has its own paperwork. The Electrical Safety Authority notes that a building permit is not the same as an electrical notification, and a kitchen project can need both. ESA guidance is that anyone you hire for electrical work in your home must be a Licensed Electrical Contractor. Homeowners can also do their own electrical work at home, but the same guidance says they still need to file a notification of work. The ESA's guide to notifications and inspections explains how to file one.
Before rough in starts, list every new circuit and fixture: appliance circuits, island power, pendants and under cabinet lighting. Lighting is the layer people forget, and adding it after drywall means cutting into finished walls. The table shows who relies on each decision and when it needs to be final.
| Decision | Who relies on it | Final before |
|---|---|---|
| Sink, dishwasher and fridge water line positions | Plumber and cabinet maker | Drawings and rough in |
| Wall removal or a wider window | Designer, framer and any structural review | The permit application |
| Appliance models and sizes | Cabinet maker and electrician | The cabinet order |
| Lighting and outlet layout | Electrician | The electrical rough in |
| Counter material and sink model | Fabricator | Counter templating |
Allowances keep two quotes comparable
A renovation quote is not useful unless the scope and allowances are clear. An allowance is the amount set aside for a choice you have not made yet, such as tile, faucets, light fixtures or cabinet hardware. When allowances are vague, two quotes that look close describe very different kitchens. Ask each contractor to name what every allowance covers and what happens when your selection costs more or less. Our guide to comparing quotes line by line walks through that check.
Clear allowances act as the budget's shock absorbers. If you fall for a counter that costs more than planned, the allowance shows exactly what the change adds, so you can trade it against another line instead of meeting the difference on the final invoice.
Plan the weeks without a kitchen
Decide before demolition where the fridge, microwave and kettle will live, how dishes will be washed and which room will hold the boxed contents of your cupboards. Through a Kitchener winter, a temporary setup near a laundry sink is far easier to live with than one in a cold garage. Agree on the entry the crew will use and where materials will be staged. Cabinets arrive before they are installed and need a dry, protected spot.
If you like to work from a printed list, our planning checklist puts these steps in order.
Write the move list first
Before you request a price, write down what moves, what stays and which choices are still open. Bring that page to a consultation and we will turn it into drawings, a trade sequence and allowances you can compare side by side.